你的浏览器禁用了JavaScript, 请开启后刷新浏览器获得更好的体验!
首页
热门
推荐
精选
登录
|
注册
iOS 简单引导界面
立即下载
用AI写一个
金额:
1
元
支付方式:
友情提醒:源码购买后不支持退换货
立即支付
我要免费下载
发布时间:2017-09-07
10人
|
浏览:6530次
|
收藏
|
分享
技术:ios
运行环境:ios8+
概述
现在很多APP在用户第一次用的时候,由于用户可能并不知道其中一些功能点的时候,这个时候就需要我们来对用户做一些引导工作。
详细
**前言** 现在很多`APP`在用户第一次用的时候,由于用户可能并不知道其中一些功能点的时候,这个时候就需要我们来对用户做一些引导工作。于是这个功能引导界面就应运而生了,先来看看大概效果吧,我这只是很简单的做了一个`demo` 走,上图 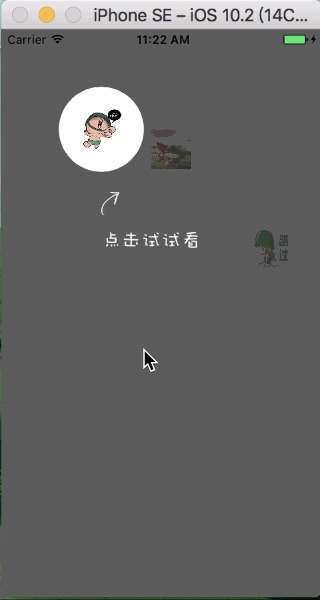 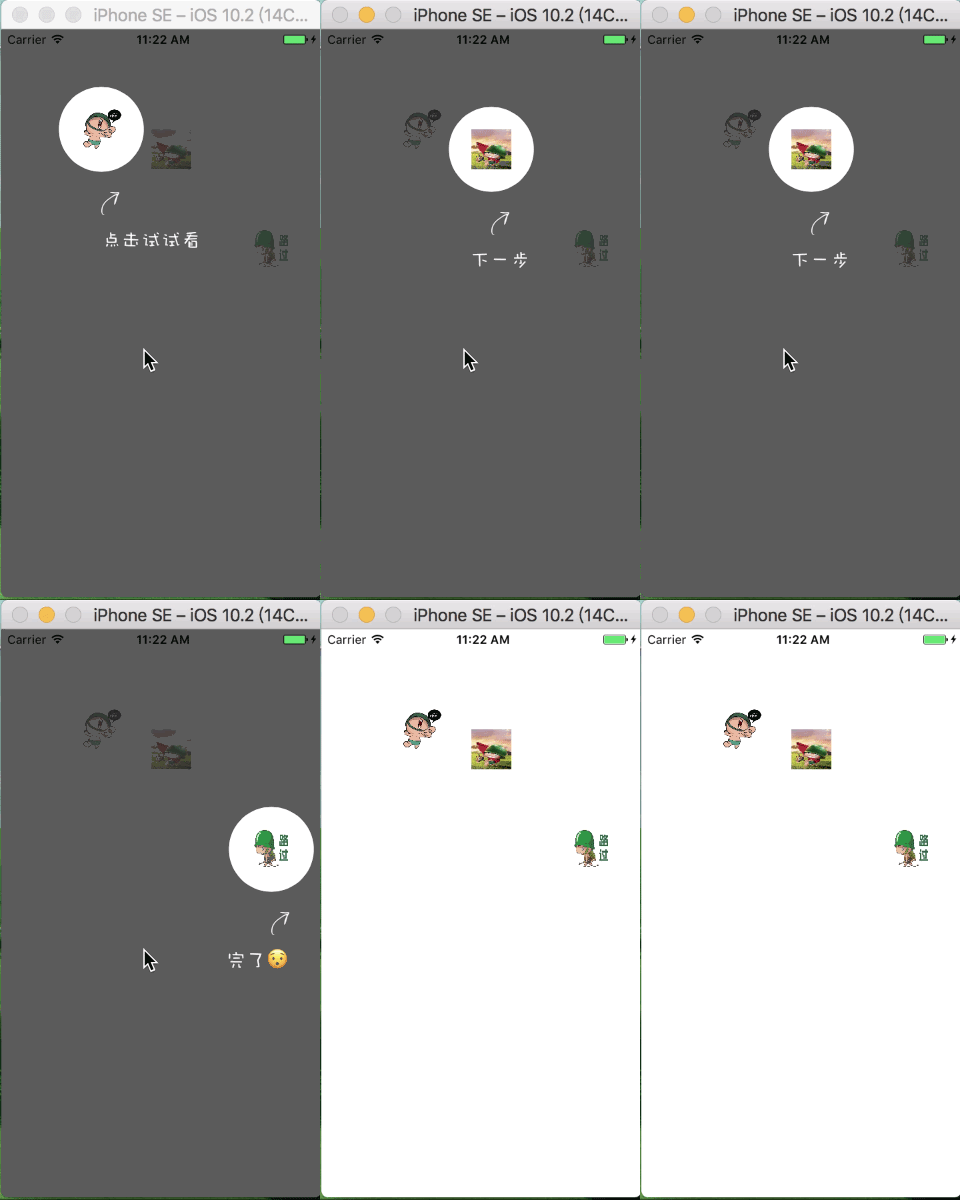 **分析** - 1 图中高亮的圆圈部分怎么做呢? - 2 怎么让我们能很轻易的把圆圈加到我们想要的地方上去呢? **解决办法** - 1 可以让UI做几套图,直接加载上面,但是这样要加许多图片,而且要是以后有新需求的话,又要去换,比较麻烦,故不考虑。 - 2 我们把我们需要高亮的部分通过坐标转换,转换到暗色背景上面,然后通过`UIBezierPath`画一个圆圈,最后通过`CAShapeLayer`的`path`属性将圆圈展示出来,由于这个是在最上层,而且下面部分不能点击,所以我将其加载了`keyWindow`上面 **部分代码** ``` - (void)showGuideViewWithTapView:(NSArray<UIView *> *)tapview tips:(NSArray<NSString *> *)tips { self.tapNumber = 0; self.tapViews = tapview; self.tips = tips; CGRect frame = [UIScreen mainScreen].bounds; UIView * bgView = [[UIView alloc] initWithFrame:frame]; bgView.backgroundColor = UICOLOR_FROM_RGB_OxFF_ALPHA(0x323232, 0.8); self.bgView = bgView; self.tapGesture = [[UITapGestureRecognizer alloc]initWithTarget:self action:@selector(sureTapClick:)]; [self.bgView addGestureRecognizer:self.tapGesture]; [[UIApplication sharedApplication].keyWindow addSubview:self.bgView]; [self addBezierPathWithFrame:frame tapView:tapview[self.tapNumber] tip:tips[self.tapNumber]]; } - (void)addBezierPathWithFrame:(CGRect)frame tapView:(UIView *)view tip:(NSString *)tip { UIImage *guideImage = [UIImage imageNamed:@"guide3"]; CGRect tap_frame = [[view superview] convertRect:view.frame toView:self.bgView]; //通过 UIBezierPath 创建路径 UIBezierPath *path = [UIBezierPath bezierPathWithRect:frame]; //画圆圈 CGFloat radius = 42.5; [path appendPath:[UIBezierPath bezierPathWithArcCenter:CGPointMake(tap_frame.origin.x + tap_frame.size.width/2.0, tap_frame.origin.y + tap_frame.size.height/2.0) radius:radius startAngle:0 endAngle:2*M_PI clockwise:NO]]; //利用CAShapeLayer 的 path 属性 CAShapeLayer *shapeLayer = [CAShapeLayer layer]; shapeLayer.path = path.CGPath; [self.bgView.layer setMask:shapeLayer]; CGFloat x = CGRectGetMidX(tap_frame); CGFloat y = CGRectGetMaxY(tap_frame) + radius; for (UIView *view in self.bgView.subviews) { if ([view isKindOfClass:[UIImageView class]] || [view isKindOfClass:[UILabel class]]) { [view removeFromSuperview]; } } UIImageView * imageView = [[UIImageView alloc]initWithFrame:CGRectMake(x,y,guideImage.size.width,guideImage.size.height)]; imageView.image = guideImage; [self.bgView addSubview:imageView]; UILabel *lable = [[UILabel alloc] init]; lable.text = tip; lable.font = [UIFont fontWithName:@"Wawati SC" size:20]; lable.textColor = [UIColor whiteColor]; //使用代码布局 需要将这个属性设置为NO lable.translatesAutoresizingMaskIntoConstraints = NO; [self.bgView addSubview:lable]; NSLayoutConstraint * constraintx = nil; //将屏幕分成三等分 来确定文字是靠左还是居中 还是靠右 (大概 可以自己调整) if (x <= frame.size.width / 3.0) { //创建x居左的约束 constraintx = [NSLayoutConstraint constraintWithItem:lable attribute:NSLayoutAttributeLeft relatedBy:NSLayoutRelationEqual toItem:imageView attribute:NSLayoutAttributeLeft multiplier:1 constant:0]; } else if ((x > frame.size.width / 3.0) &&(x <= frame.size.width * 2 / 3.0)) { //创建x居中的约束 constraintx = [NSLayoutConstraint constraintWithItem:lable attribute:NSLayoutAttributeCenterX relatedBy:NSLayoutRelationEqual toItem:imageView attribute:NSLayoutAttributeCenterX multiplier:1 constant:0]; } else { //创建x居右的约束 constraintx = [NSLayoutConstraint constraintWithItem:lable attribute:NSLayoutAttributeRight relatedBy:NSLayoutRelationEqual toItem:imageView attribute:NSLayoutAttributeRight multiplier:1 constant:0]; } //创建y坐标的约束 NSLayoutConstraint * constrainty = [NSLayoutConstraint constraintWithItem:lable attribute:NSLayoutAttributeTop relatedBy:NSLayoutRelationEqual toItem:imageView attribute:NSLayoutAttributeBottom multiplier:1 constant:10]; [self.bgView addConstraints:@[constraintx,constrainty]]; self.tapNumber ++; } ``` 在上面代码中,我把需要高亮的部分的`view`装在了数组里面,并且把提示文字也加入到数组中,然后传入,这样如果是在一个界面有几个地方需要进行展示,就不用重复调用,只需要传入对应的参数就可以。 注意:在使用的时候,如果程序打开的第一个界面就是引导界面 建议在 viewDidAppear 中调用,因为此时` [UIApplication sharedApplication].keyWindow` 为`nil`,`keywindow`实际上没有初始化完成 在代码中,由于用到了第三方字体,这里也简答注释下怎么加入第三方字体,大神勿喷哈,我只是记录一下,简单的记录一下 **第三方字体导入** 首先在`plist`文件中  然后在`TARGETS->Build Phases-> Copy Bundle Resources`中导入字体 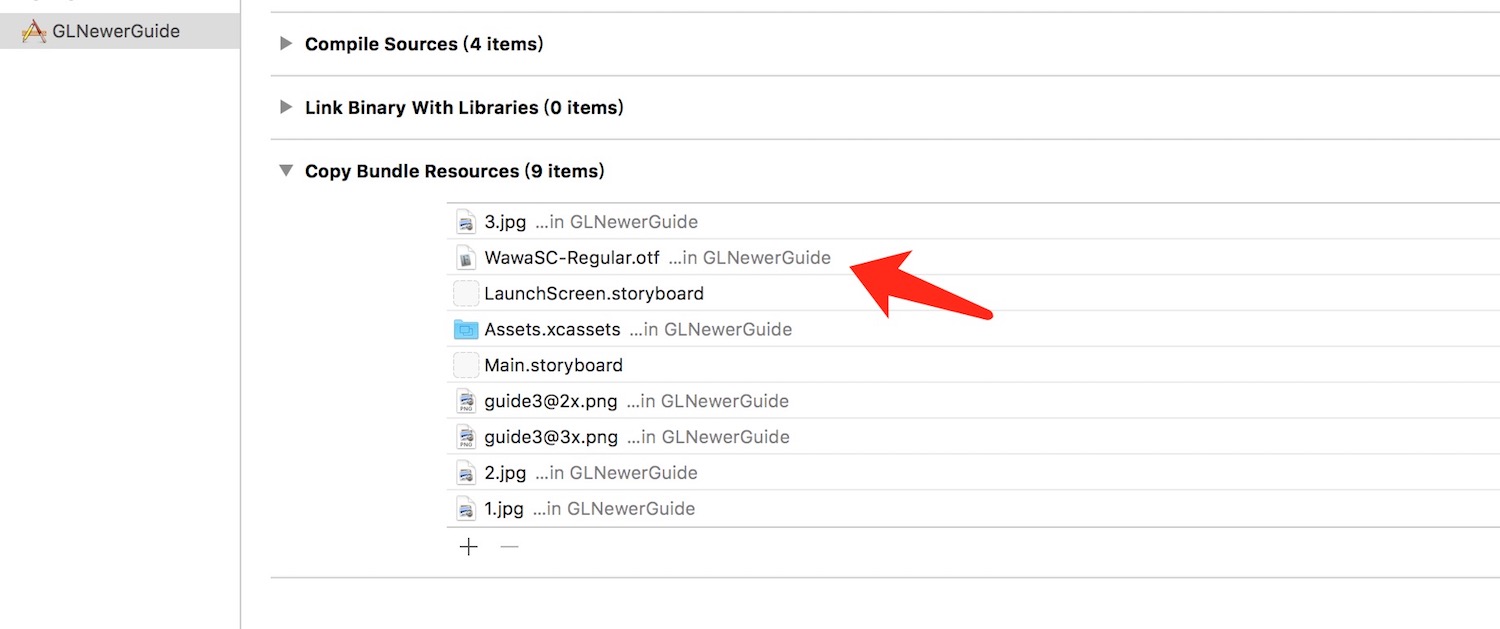 到此字体就可以使用了,但是还有个问题,就是`[UIFont fontWithName:@"Wawati SC" size:20];`中的字体名字我们需要去获取,有下面两个方法 - 1 用代码去遍历字体库,打印字体名字 ``` //打印字体 NSArray * fontArrays = [[NSArray alloc] initWithArray:[UIFont familyNames]]; for (NSString * font in fontArrays) { NSLog(@"Font name = %@", font); } ``` 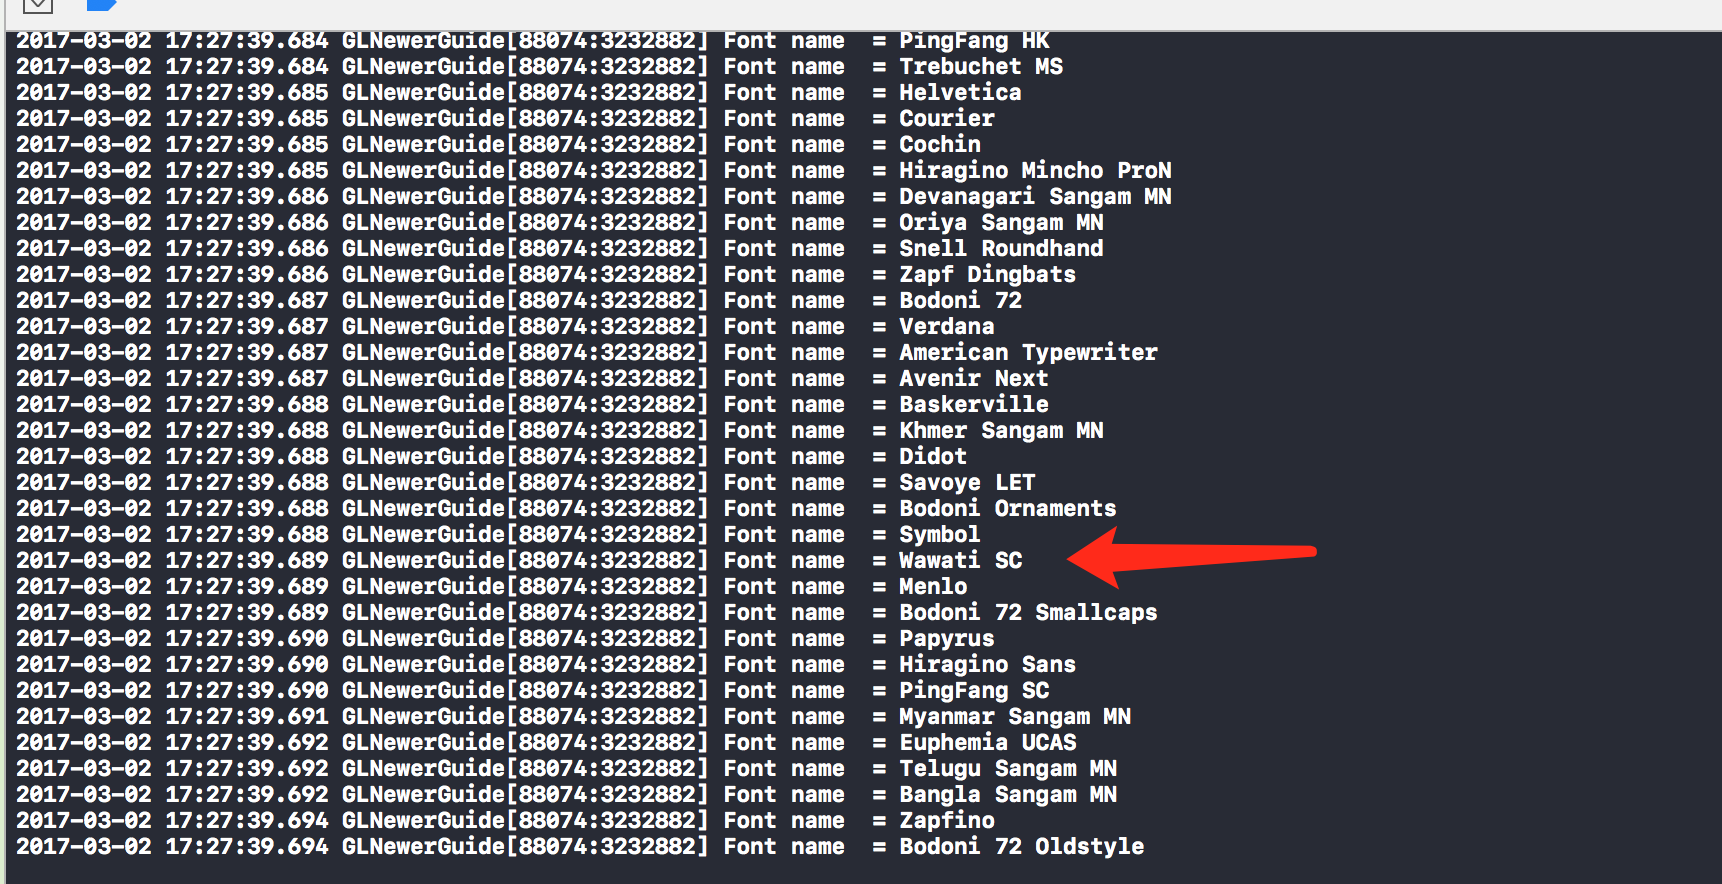 - 2 双击字体,然后会安装到字体库中,在字体库的详细信息中,我们可以得到 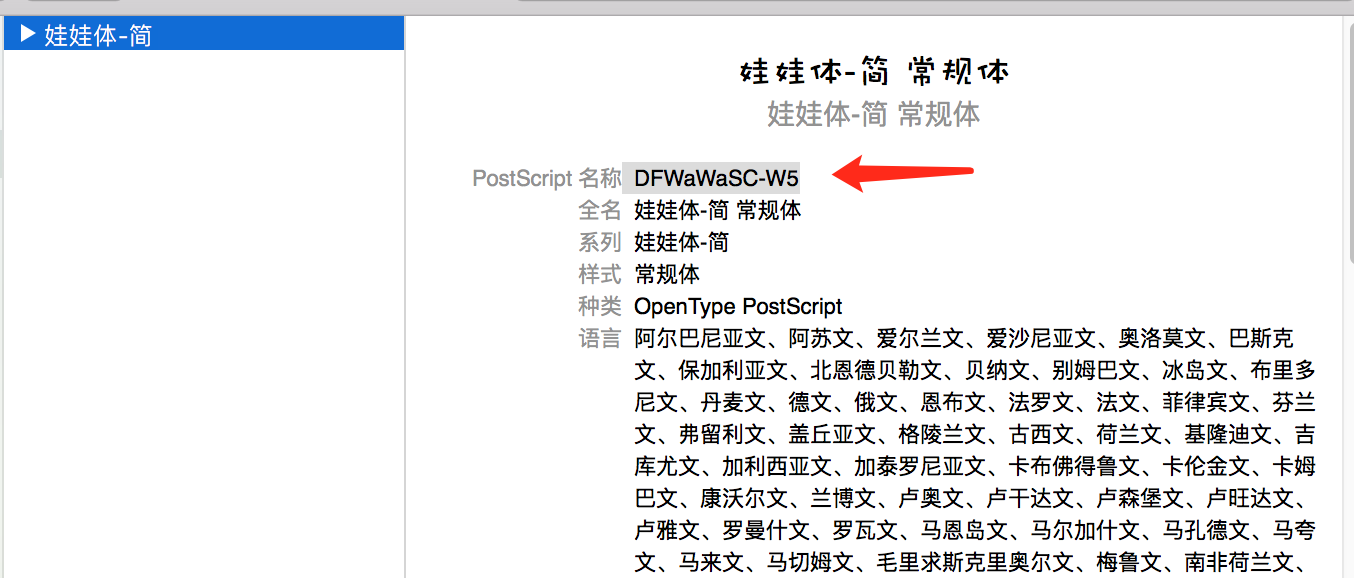 两种方式在名字上有点不同,但是效果是同的,我估计是因为在`mac`上,名字有些不一样. #####项目文件截图: 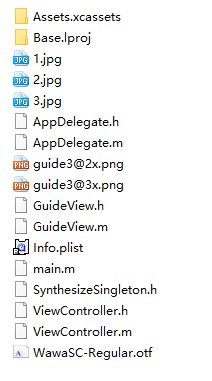
本实例支付的费用只是购买源码的费用,如有疑问欢迎在文末留言交流,如需作者在线代码指导、定制等,在作者开启付费服务后,可以点击“购买服务”进行实时联系,请知悉,谢谢
感谢
0
手机上随时阅读、收藏该文章 ?请扫下方二维码
相似例子推荐
评论
作者
敷衍丶尘世
16
例子数量
617
帮助
43
感谢
评分详细
可运行:
4.5
分
代码质量:
4.5
分
文章描述详细:
4.5
分
代码注释:
4.5
分
综合:
4.5
分
作者例子
iOS 仿支付宝密码支付
iOS 九宫格手势密码
iOS CAReplicatorLayer 简单动画
iOS 之UIBezierPath
iOS 核心动画 Core Animation浅谈
iOS CoreImage之滤镜简单使用
iOS UIButton文字和图片间距随意调整
iOS 简单引导界面
iOS 两种不同的图片无限轮播
iOSQuart2D绘图之UIImage简单使用
iOS 自定义键盘
iOS 自定义转场动画浅谈
iOS Core ML与Vision初识
iOS 11之Vision人脸检测
iOS之基于FreeStreamer的简单音乐播放器(模仿QQ音乐)
iOS 音频视频图像合成那点事