spine动画查看器实现
概述
详细
一、运行效果
二、实现过程
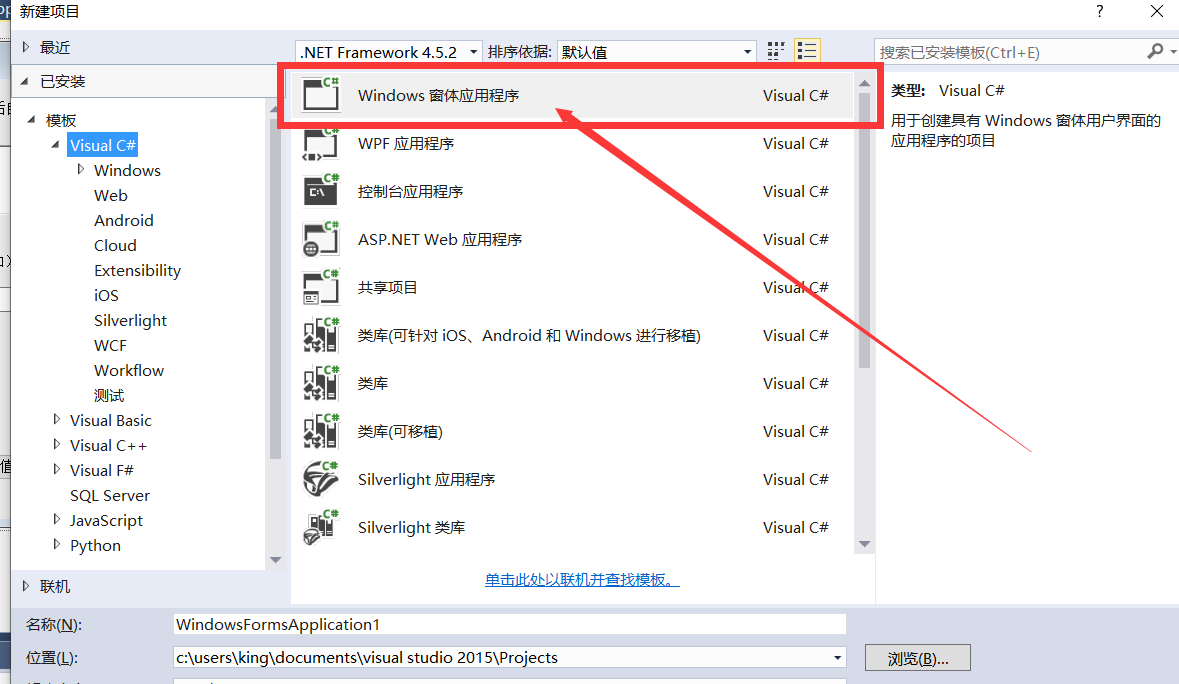
1、创建 c# 窗体应用程序
请到官方下载vs2015或者其他版本,创建c#窗体程序, 参照对用的显示内容,创建 对应的按钮,文本框,之类的组件。
2、处理 .json 中的动画 名字
spine 源文件中的动画名字 在.json 文件中,在字符串 “animations” 后的内容,需要代码解析出来。需要根据 “{”,“}”字符串,截取出具体的内容,然后把名字写入到 项目根目录下的info.lua 文件中去,用以love引擎启动所读取,具体代码如下,
     //解析json 文件
     public static List<String> dealJsonFile() {
                string jsonPath = fileName + @"\spineRes\"+ spineName + ".json";
                StreamReader m_sr = new StreamReader(jsonPath);
                string orgInfo = m_sr.ReadToEnd();
                m_sr.Close();
                orgInfo = orgInfo.Replace("\n", "").Replace(" ", "").Replace("\t", "").Replace("\r", "");

                string strDealInfo = orgInfo.Substring(orgInfo.IndexOf("animations\":{")).Substring(13);
                int tempSymbolNum = 0;
                bool isRecording = true;
                string strKeyPaty = "";

                List<String> keyList = new List<String>();
                for (int i = 0; i < strDealInfo.Length; i++)
                {
                    string strTemp = strDealInfo.Substring(i, 1);
                    if (isRecording)
                    {
                        strKeyPaty = strKeyPaty + strTemp;
                    }
                    if ("{".Equals(strTemp))
                    {
                        tempSymbolNum = tempSymbolNum + 1;
                        if (isRecording)
                        {
                            keyList.Add(strKeyPaty);
                            isRecording = false;
                            strKeyPaty = "";
                        }
                    }
                    else if ("}".Equals(strTemp))
                    {
                        tempSymbolNum = tempSymbolNum - 1;
                        if (tempSymbolNum == 0)
                        {
                            isRecording = true;
                        }
                    }
                }

                for (int i = 0; i < keyList.ToArray().Length; i++)
                {
                    keyList[i] = keyList[i].Replace("\":{", "").Replace("\"", "").Replace(",", "");
                }
                return keyList;
            }

            //写入文件
            public static void writeInfo(List<String> list)
                        {
                            string dirFilePath = fileName + @"\info.lua";
                            string info = "tblAnimName = {";
                            foreach (var item in list)
                            {
                                info = info + "\"" + item + "\", ";
                            }
                            info = info + "}";
                            StreamWriter m_sw = new StreamWriter(dirFilePath);
                            m_sw.Write(info);
                            m_sw.Close();
                        }
3、 配置 运行spine 弹窗的 相关参数
该 程序上, 有宽度,高度,spine缩放比例,spine播放索引, spine 的 文件 前缀等参数,需要把这些参数 读取到 config.lua 文件夹中去,让love游戏引擎读取相关配置,相关代码如下
    // 写入配置
    public static void writeConfigInfo(string width, string height,string scale, string spineName, string startIndex, string endIndex, int maxIndex)
        {
            string dirFilePath = fileName + @"\config.lua";
            string info = strWidth + "=" + width + "\n";
            info = info + strHeight + "=" + height + "\n";
            info = info + strScale + "=" + scale + "\n";
            info = info + "runSpineName" + "=\"" + spineName + "\"\n";
            string curEndIndex = endIndex;

            if(Convert.ToInt32(endIndex) > maxIndex) {
                curEndIndex = maxIndex + "";
            }
            info = info + "runSpineStartIndex" + "=" + startIndex + "\n";
            info = info + "runSpineEndIndex" + "=" + endIndex + "\n";

            StreamWriter m_sw = new StreamWriter(dirFilePath);
            m_sw.Write(info);
            m_sw.Close();
        }
        // 读取配置
        public static void readConfigInfo()
        {
            string dirFilePath = fileName + @"\config.lua";
            StreamReader m_rd = new StreamReader(dirFilePath);

            string strLine = m_rd.ReadLine();
            while(strLine != null)
            {
                if (strLine.StartsWith(strWidth)) {
                    winWidth = strLine.Replace(" ", "").Replace(strWidth + "=", "");
                } else if (strLine.StartsWith(strHeight)) {
                    winHeight = strLine.Replace(" ", "").Replace(strHeight + "=", "");
                }else if (strLine.StartsWith(strScale)){
                    spineScale = strLine.Replace(" ", "").Replace(strScale + "=", "");
                }
                strLine = m_rd.ReadLine();
            }
            m_rd.Close();
        }

        //找到 .json 对应的spine 文件前缀名
        public static string findJsonFile(string filePath)
        {

            DirectoryInfo fatherInfo = new DirectoryInfo(filePath);
            foreach (FileInfo NextFile in fatherInfo.GetFiles())
            {
                string tempFileName = NextFile.Name;
                if (tempFileName.EndsWith(".json")) {
                    return tempFileName;
                }
            }
            return "error";
        }
4、 拖拽功能,文件复制 功能实现
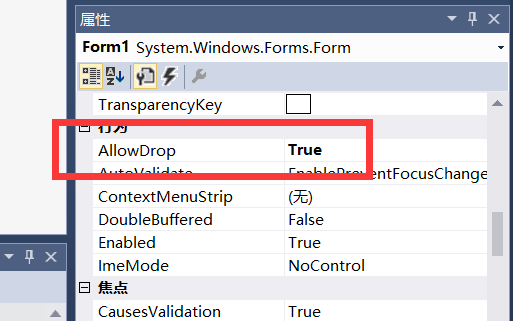
该程序,比较重要的一点是,拖拽.json文件, 然后把对用的spine 源文件 复制到 项目路径下的spineRes 文件夹中去,复制前,需要先删除掉旧的spine 文件,参考的背景底图,也是同样的原理。 注意,需要把下图的拖拽选项改为true。
相关拖拽,复制文件的代码如下。
     //   c# 自动生成的拖拽方法,添加如下内容
    private void Form1_DragOver(object sender, DragEventArgs e)
            {

                string fileInfo = ((System.Array)e.Data.GetData(DataFormats.FileDrop)).GetValue(0).ToString();
                if (fileInfo.EndsWith(".json") && !curInfo.Equals(fileInfo))
                {
                    curInfo = fileInfo;
                    richTextBox2.Text = fileInfo;
                    dealShowAction();
                }else if (fileInfo.EndsWith(".png"))
                {
                    textBox3.Text = fileInfo;
                    Common.deleteBgImg();
                    Common.copyBgImg(textBox3.Text);
                }
            }
         //复制图片
      public static void copyBgImg(string orgPath)
        {
            string imgPath = fileName + @"\useBg.png";

            FileInfo fileInfo = new FileInfo(orgPath);
            fileInfo.CopyTo(imgPath);
        }
        // 删除图片
        public static void deleteBgImg()
        {
            string imgPath = fileName + @"\useBg.png";

            FileInfo fileInfo = new FileInfo(imgPath);
            if (fileInfo.Exists) {
                fileInfo.Delete();
            }
        }
        // 更新spine 文件
         public static void updateSpineFile(string needFilePath)
        {
            string aimsDir = fileName + @"\spineRes";


            FileInfo oldFileInfo = new FileInfo(aimsDir);
            if (oldFileInfo.Exists)
            {
                oldFileInfo.Delete();
            }


            Clear_Files(aimsDir);
            FileInfo fileInfo = new FileInfo(needFilePath);
            DirectoryInfo fatherInfo = fileInfo.Directory;
            foreach (FileInfo NextFile in fatherInfo.GetFiles())
            {
                string tempFileName = NextFile.Name;
                if (tempFileName.StartsWith(spineName))
                {
                    NextFile.CopyTo(aimsDir + "\\" + tempFileName);
                }
            }
        }
5、 启动love.exe 程序, 功能总入口
以上几部分,基本把c# 所需要的功能都做好了,现在需要整合总入口,启动love.exe 程序(用以显示spine动画弹窗),具体代码如下
 // 点击显示 spine 弹窗
 private void button2_Click_1(object sender, EventArgs e)
        {
            if (richTextBox2.Text != "" && richTextBox2.Text.EndsWith(".json"))
            {
                dealShowAction();
            }else if(richTextBox2.Text != "")
            {
                string res = Common.findJsonFile(richTextBox2.Text);
                if (res.Equals("error"))
                {
                    MessageBox.Show("JSON NO EXIST");
                }
                else {
                    richTextBox2.Text = richTextBox2.Text + "\\"+ res;
                    dealShowAction();
                }
            }
            else {
                MessageBox.Show("JSON NO EXIST");
            }
        }

       // 程序总口
      private void dealShowAction()
            {
                string spineName = Common.setSpineKey(richTextBox2.Text);  // 获取 spineName

                Common.updateSpineFile(richTextBox2.Text); // 获取 复制  spine 动画

                List<String> nameList = Common.dealJsonFile();    // 获取 spine 动画名字

                Common.writeInfo(nameList);  //  动画名写入本地 info.lua  中
                richTextBox1.Text = Common.getShowInfo(nameList); //  右侧  richBox  显示 文本 更新

                int curAnimNum = nameList.ToArray().Length;
                label5.Text = "当前spine动画 总数: " + curAnimNum;

                if (curAnimNum <= 10)
                {
                    textSpineStart.Text = "1";
                    textSpineEnd.Text = curAnimNum + "";
                    Common.writeConfigInfo(textWidth.Text, textHeight.Text, textScale.Text, spineName, "1", curAnimNum + "", curAnimNum);  //  相关配置信息内容 写入项目下的 config.lua  中
                    Common.runExe();
                }
                else {
                    if (textSpineStart.Text == "" || textSpineEnd.Text == "")
                    {
                        MessageBox.Show("请输入 动画 索引范围");
                    }
                    else {
                        Common.writeConfigInfo(textWidth.Text, textHeight.Text, textScale.Text, spineName, textSpineStart.Text, textSpineEnd.Text, curAnimNum);  //  相关配置信息内容 写入项目下的 config.lua  中
                        Common.runExe();
                    }
                }
            }


        //  c# 启动  exe 程序方法
        public static void runExe()
        {
            string resultStr = "";
            string strCmdStr = "start " + fileName + @"\love-11.3-win64\love.exe " + fileName;
            string[] cmdK = { strCmdStr };
            RunCMDCommand(out resultStr, cmdK);
        }


         //  运行 cmd 命名
        private static void RunCMDCommand(out string outPut, params string[] command)
        {
            using (Process pc = new Process())
            {
                Console.WriteLine("8545648948");
                pc.StartInfo.FileName = "cmd.exe";
                pc.StartInfo.CreateNoWindow = false;//隐藏窗口运行
                pc.StartInfo.RedirectStandardError = true;//重定向错误流
                pc.StartInfo.RedirectStandardInput = true;//重定向输入流
                pc.StartInfo.RedirectStandardOutput = true;//重定向输出流
                pc.StartInfo.UseShellExecute = false;
                pc.Start();
                int lenght = command.Length;
                foreach (string com in command)
                {
                    pc.StandardInput.WriteLine(com);//输入CMD命令
                }
                pc.StandardInput.WriteLine("exit");//结束执行,很重要的
                pc.StandardInput.AutoFlush = true;

                outPut = pc.StandardOutput.ReadToEnd();//读取结果

                pc.WaitForExit();
                pc.Close();
            }
        }
6、love引擎 lua代码 部分
通过以上几步,c#窗体方面的工作已经完成, 现在需要修改 spine运行库 LOVE- SPINE 官方案例,修改其中的代码,实现 此程序。 (可参考 http://zh.esotericsoftware.com/spine-runtimes/ spine运营库中love引擎使用)如果不熟悉love 引擎,请到
https://love2d.org/wiki/Main_Page 简单了解一下。
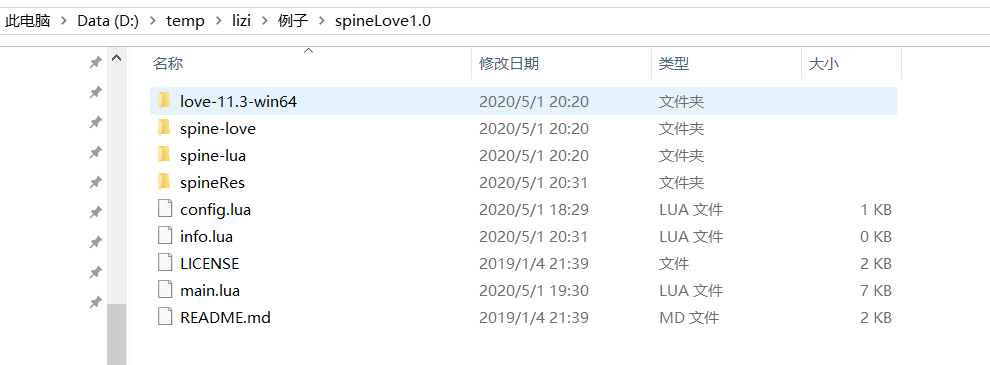
还需要主要的是,需要把love引擎的 love.zip包 (http://www.love2d.org/) ,放在项目里,用以启动 love.exe 程序 ,入下图所示:
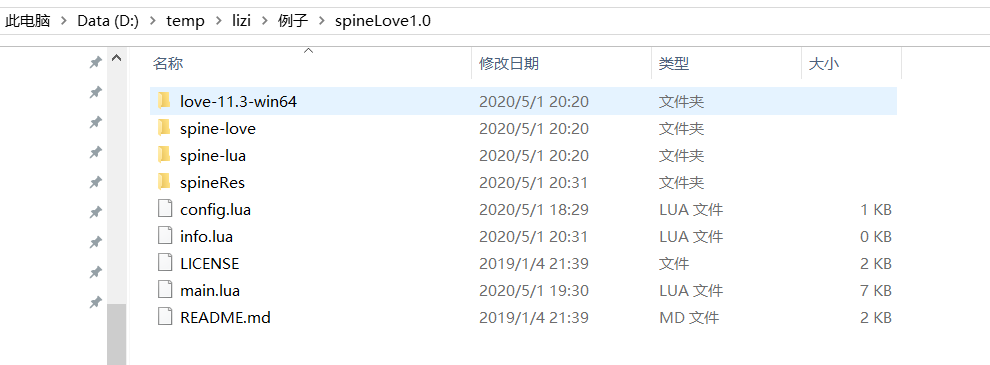
此程序使用love 引擎的原因是简单,不需要配置任何环境, 修改一下 main.lua 中的代码,用步骤5 中的方法,执行一下love.exe 即可展示效果。 main.lua 修改的代码如下
    // love 引擎主方法
    function love.load(arg)
	love.filesystem.load("config.lua")()   //加载 config.lua 文件,用以读取相关的配置信息 ,里面的内容为
                                        	/*runWidth=1280
                                                runHeight=720
                                                runScale=1
                                                runSpineName="skeleton"
                                                runSpineStartIndex=2
                                                runSpineEndIndex=2 */


	sizeCurWidth, sizeCurHeight = runWidth,runHeight
	love.window.setMode(sizeCurWidth, sizeCurHeight)  // 设置窗体大小


	local spBgFileName = "useBg.png"   // 设置参考的背景图
	if love.filesystem.exists(spBgFileName) then
		imgCurBg = love.graphics.newImage(spBgFileName)
		imgCurBgWidth = imgCurBg:getPixelWidth()
		imgCurBgHeight = imgCurBg:getPixelHeight()
	end

	if arg[#arg] == "-debug" then require("mobdebug").start() end
	skeletonRenderer = spine.SkeletonRenderer.new(true)

	love.filesystem.load("info.lua")()  // 加载 info.lua 文件,用以读取 所有的动画名字,里面的内容为  tblAnimName = {"animation1", "animation2"}

	for i = runSpineStartIndex, runSpineEndIndex do
		table.insert(skeletons, loadSkeleton(runSpineName, runSpineName, tblAnimName[i], nil, runScale, sizeCurWidth/ 2, sizeCurHeight / 2))  // 加载到spine 表里
	end
    end

       // love 引擎每帧调用
    function love.draw()
	if imgCurBg then
		love.graphics.draw(imgCurBg, sizeCurWidth/ 2 - imgCurBgWidth / 2, sizeCurHeight / 2 - imgCurBgHeight/ 2) // 设置参考的背景图
	end
	-- love.graphics.setBackgroundColor(0, 0, 0, 255)  // 设置背景颜色
	-- love.graphics.setColor(255, 255, 255)
	local skeleton = skeletons[activeSkeleton].skeleton
	skeletonRenderer:draw(skeleton)
	love.graphics.print(tblAnimName[activeSkeleton + runSpineStartIndex - 1], 50, 50)  // 设置 显示的 动画名,
    end

        // love 引擎 鼠标点击事件  用以切换 spine动画
    function love.mousepressed (x, y, button, istouch)
	if x > sizeCurWidth/ 2 then
		activeSkeleton = activeSkeleton + 1
		if activeSkeleton > #skeletons then activeSkeleton = 1 end
	else
		activeSkeleton = activeSkeleton - 1
		if activeSkeleton <= 0 then activeSkeleton = #skeletons end
	end
    end
7、总结
通过以上 几部分,就可以实现,spine 动画的快速查看,及修改展示内容。 对love引擎不熟悉的,请多百度了解,练习。本程序,把所有需要手动操作,统统代码化实现操作,个人可根据自己不用的需要,修改一下源代码内容,即可实现,更加丰富的spine 功能,此程序只是初级demo。
三、项目结构图
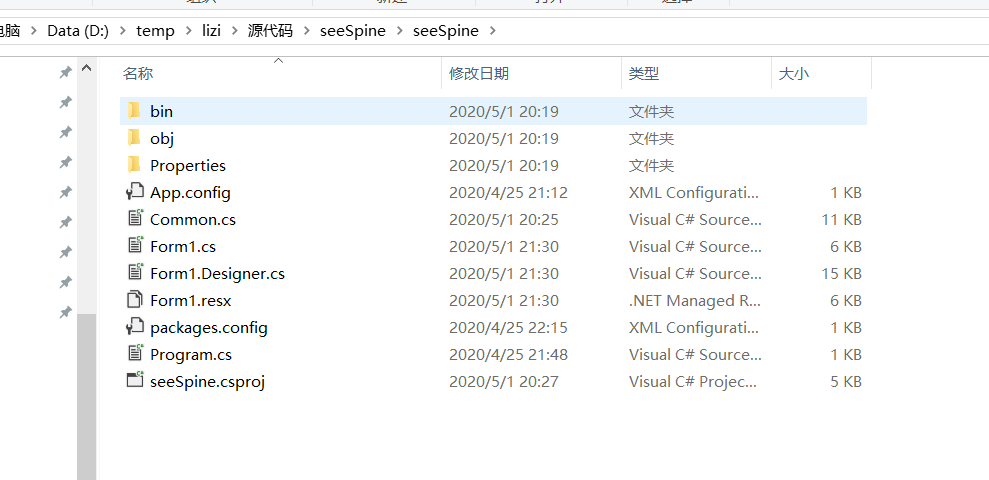
1、c#部分
2、love引擎 部分
