你的浏览器禁用了JavaScript, 请开启后刷新浏览器获得更好的体验!
首页
热门
推荐
精选
登录
|
注册
iOS 吸附悬浮按钮实现
立即下载
用AI写一个
金额:
0
元
支付方式:
免费下载
发布时间:2022-06-02
2人
|
浏览:1454次
|
收藏
|
分享
技术:iOS+Swfit
运行环境:Xcode+Swift
概述
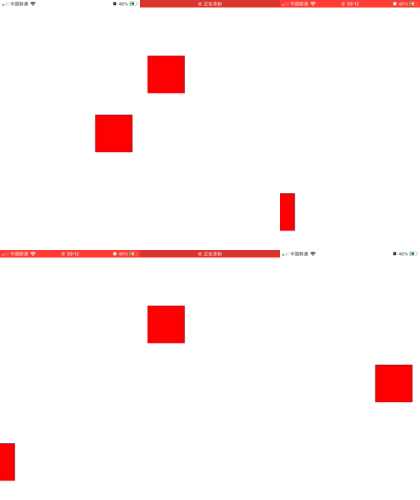
实现了按钮吸附在屏幕左右两侧效果
详细
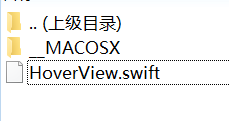
> 实现按钮吸附在屏幕左右两侧效果 ### 效果图  ### 代码 ``` import UIKit class HoverView: UIView { /// 屏幕宽度 private var screenW: CGFloat = UIScreen.main.bounds.size.width /// 屏幕高度 private var screenH: CGFloat = UIScreen.main.bounds.size.height /// 悬浮view 大小 private let size: CGSize = CGSize(width: 100, height: 100) /// 顶部最小 margin private let topMinMargin: CGFloat = 88 /// 底部最小 margin private let bottomMinMargin: CGFloat = 88 /// 左边最小 margin private let leftMinMargin: CGFloat = 20 /// 右边最小 magin private let rightMinMargin: CGFloat = 20 /// 拖动开始时 位置 private var beginPoint: CGPoint = .zero /// 点击开始 override func touchesBegan(_ touches: Set<UITouch>, with event: UIEvent?) { super.touchesBegan(touches, with: event) guard let touch = touches.first else {return} let curPoint = touch.location(in: self) let prePoint = touch.previousLocation(in: self) let offsetX = curPoint.x - prePoint.x let offsetY = curPoint.y - prePoint.y let centerX = offsetX + self.center.x let centerY = offsetY + self.center.y /// 记录开始位置 beginPoint = CGPoint(x: centerX, y: centerY) } /// 拖动 override func touchesMoved(_ touches: Set<UITouch>, with event: UIEvent?) { super.touchesMoved(touches, with: event) guard let touch = touches.first else {return} let curPoint = touch.location(in: self) let prePoint = touch.previousLocation(in: self) let offsetX = curPoint.x - prePoint.x let offsetY = curPoint.y - prePoint.y let centerX = offsetX + self.center.x let centerY = offsetY + self.center.y /// 拖动 self.center = CGPoint(x: centerX, y: centerY) } /// 点击结束 override func touchesEnded(_ touches: Set<UITouch>, with event: UIEvent?) { super.touchesEnded(touches, with: event) guard let touch = touches.first else {return} let curPoint = touch.location(in: self) let prePoint = touch.previousLocation(in: self) let offsetX = curPoint.x - prePoint.x let offsetY = curPoint.y - prePoint.y let centerX = offsetX + self.center.x let centerY = offsetY + self.center.y let endPoint = CGPoint(x: centerX, y: centerY) /// 区分点击和拖动 if endPoint == beginPoint { /// 点击 // TODO: 处理点击事件 } else { /// 拖动 correctLocation() } } /// 修正位置 动画吸附在屏幕两侧 func correctLocation() { var endCenter = center endCenter.x = center.x > screenW * 0.5 ? screenW-(rightMinMargin + size.width * 0.5) : (leftMinMargin + size.width * 0.5) if center.y < (topMinMargin + size.height * 0.5) { endCenter.y = (topMinMargin + size.height * 0.5) } else if center.y > screenH - (bottomMinMargin + size.height * 0.5) { endCenter.y = screenH - (bottomMinMargin + size.height * 0.5) } UIView.animate(withDuration: 0.25) { self.center = endCenter } } func setSubView() { self.backgroundColor = .red } init() { super.init(frame: CGRect(x: 0, y: 0, width: size.width, height: size.height)) setSubView() } required init?(coder aDecoder: NSCoder) { fatalError("init(coder:) has not been implemented") } } ``` ### 代码结构图 本项目只有一个源码文件,如下: 
本实例支付的费用只是购买源码的费用,如有疑问欢迎在文末留言交流,如需作者在线代码指导、定制等,在作者开启付费服务后,可以点击“购买服务”进行实时联系,请知悉,谢谢
感谢
0
手机上随时阅读、收藏该文章 ?请扫下方二维码
相似例子推荐
评论
作者
mr.wendao
5
例子数量
173
帮助
0
感谢
评分详细
可运行:
4.5
分
代码质量:
4.5
分
文章描述详细:
4.5
分
代码注释:
4.5
分
综合:
4.5
分
作者例子
iOS 购物车动画
iOS 扫雷游戏
iOS 滑块拼图游戏(Puzzle8)
iOS 转盘动画效果实现
iOS 吸附悬浮按钮实现